
Here is the best-kept open secret in room acoustics: the same panel can absorb twice as much low-frequency sound simply by moving it 50mm away from the wall. No premium material, no thicker product — just air. Cavity mounting is the cheapest, most underused upgrade in the acoustic panel business, and understanding it changes how you specify, quote and install everything.
The physics in one paragraph
A porous absorber — PET felt, mineral wool, fabric — converts sound to heat through friction as air moves through its fibers. For that to work, air must actually move: particle velocity is highest at a quarter-wavelength from the reflecting wall behind. A panel glued flat to masonry sits at the wall itself, where air barely moves at low frequencies — so thin panels do little below 500 Hz. Introduce a cavity, and the zone of maximum air movement shifts into the panel. The resonance frequency of the panel-plus-cavity system is roughly f ≈ c / (4 × (t + d)) — thickness plus gap depth. Deepen the gap, and the absorption curve slides down in frequency: 25mm of gap starts working around 500 Hz; 50mm reaches toward 250 Hz and below.
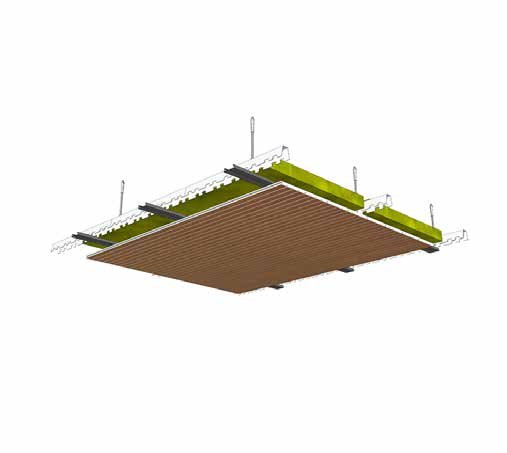
What the numbers look like
Laboratory data makes the effect concrete. A 12mm PET panel mounted directly (Type A mounting) absorbs well through the speech band but falls away below 250 Hz. The same panel on 45mm battens (Type D-50 in test parlance) typically gains dramatically at 250 Hz and measurably at 125 Hz — enough to move a room’s reverberation profile where it is hardest to treat. The effect scales predictably: deeper cavity, lower benefit frequency, diminishing returns beyond about 100mm unless the cavity is filled with porous material.
The practical corollary: a 12mm panel on battens can outperform a 24mm panel glued flat at a fraction of the material cost. When budget conversations stall on price per square meter, the intelligent move is often to buy thinner panels and spend the difference on timber.
How to build it properly
- Frame it. Timber or metal battens at 400–600mm centers, fixed plumb to the substrate. The frame doubles as a service channel for cabling — a real bonus in offices and education projects.
- Mind the edges. Keep the cavity connected to the room through the panel face; do not seal the panel perimeter with adhesive blobs that short-circuit the gap. Mechanical fixing (z-clips, screws with washers) preserves the physics.
- Optionally fill. Adding a lightweight porous infill (or leaving an air layer against the wall) extends the low-frequency benefit; fully stuffing the cavity with dense material can reflect rather than absorb — “soft and sparse” beats “hard and packed”.
- Match the test report. When quoting performance, use absorption data measured at the mounting you will actually build — a Type E-200 report describes a 200mm cavity, not your 25mm batten.

When flat mounting is still right
Cavity mounting is not always practical. Shallow corridors, direct-stick programs on budget schedules, and demountable wall systems sometimes demand flat installation — and mid-to-high frequency absorption is still excellent there. The honest specification answer: flat where you must, cavity where you can, and thicker panels where neither gap nor depth is available. Combine the three intelligently and even modest panel budgets deliver professional-grade room acoustics — because the air behind the panel, which costs nothing, is doing quiet, invisible work in every number on the test report.
How Much Air Gap Is Enough?
The classic laboratory data assumes a specific mounting, and the fine print matters. A 25 mm panel mounted hard against a wall delivers its tested NRC; the same panel on a 50 mm cavity shifts its absorption curve downward in frequency, absorbing noticeably more bass while sacrificing little in the speech band. Beyond roughly 100 mm of air, additional depth yields diminishing returns for thin panels, which is why deep cavity construction is usually reserved for projects chasing low-frequency control – music rooms, cinemas, studios. For typical offices and classrooms, a 40 to 50 mm cavity behind 12 to 24 mm felt panels is the sweet spot: measurable low-frequency benefit, minimal loss of usable floor depth, and straightforward detailing around skirtings and door reveals.
Cavity construction interacts with wall build-up in ways worth checking early. A cavity sealed at top and bottom behaves differently from a ventilated one; battens create partial partitions within the cavity; and services running through the gap can short-circuit the air spring that makes cavities effective. For projects where acoustic performance is specified numerically, ask the supplier for absorption data at the actual mounting depth, not just the direct-fixed figure. Reputable manufacturers publish or can provide per-frequency absorption coefficients for standard cavity depths, and acoustic consultants will model the room honestly only if the input data matches the built condition.
Practical Build Details That Preserve Performance
Three construction details protect the acoustic value of a cavity. First, continuity: an air gap interrupted by dense blocking at every second stud loses much of its benefit, so keep the cavity open behind the treated area. Second, edge sealing strategy: for absorption panels the cavity should not be airtight – absorption works by letting sound in – but flanking paths around the panel perimeter should be considered where partitions also carry sound-insulation duties. Third, fire and services coordination: confirm the cavity treatment complies with the wall’s fire rating, and route cabling so it does not compress the gap. Projects that respect these details routinely record reverberation reductions 20 to 30 percent greater than identical panels hard-fixed – a free upgrade available to any team willing to plan fifty millimetres of depth at design stage.
Key Takeaways
- A 40-50 mm cavity behind 12-24 mm felt is the sweet spot for most commercial rooms.
- Air gaps shift absorption downward in frequency – bass benefits, speech band barely changes.
- Ask for absorption data at the actual mounting depth, not just direct-fixed figures.
- Keep cavities continuous, route services carefully, and expect 20-30 percent better results than hard-fixing.